Knowledge Base
Explore common inquiries about polyester resin
During the SMC/BMC compression molding process, it is essential to control three key factors: molding temperature, molding pressure, and molding time.
1. Control of Molding Temperature
Molding temperature refers to the temperature of the mold during compression molding. This parameter determines the heat transfer conditions from the mold to the material in the cavity, which significantly influences the material’s melting, flow, and curing processes.
Temperature changes during the SMC/BMC molding process are complex. Since plastics are poor heat conductors, there is a significant temperature difference between the core and edges of the material in the early stages of molding. This results in the curing and cross-linking reactions starting at different times in the inner and outer layers of the material.
The outer layer of the material, which receives heat earlier, cures first and forms a hard shell. As the inner layer cures later and shrinks, it is constrained by the hardened outer shell, causing residual compressive stress on the surface and residual tensile stress in the inner layer. These residual stresses can lead to warping, cracking, and reduced product strength. Therefore, minimizing the temperature difference within the material and eliminating uneven curing are essential for producing high-quality products.
The molding temperature of SMC/BMC materials depends on the exothermic peak temperature and curing rate of the curing system. It is typically set slightly below the peak temperature, usually between 135–170°C, and determined through experimentation.
- Fast-curing systems: Use the lower end of the temperature range.
- Slow-curing systems: Use the higher end of the temperature range.
- Thin-walled products: Use the upper limit of the temperature range.
- Thick-walled products: Use the lower limit of the temperature range.
However, for thin-walled products with significant depth, a lower temperature within the range may be necessary to prevent material curing during flow.
Raising the molding temperature appropriately, without compromising product strength and other performance indicators, can shorten the molding cycle and improve product quality. On the other hand, too low a temperature results in high viscosity and poor flowability of the melted material, incomplete cross-linking, reduced product strength, dull appearance, and issues like sticking and deformation during demolding.
2. Control of Molding Pressure
Molding pressure, usually expressed as molding pressure intensity (MPa), is the ratio of the total force applied by the hydraulic press to the mold’s projected area in the pressing direction.
The purpose of molding pressure in the compression molding process is to:
- Ensure tight closure of the mold.
- Compact the material.
- Facilitate melt flow and balance the pressure from low-molecular-weight volatiles in the cavity.
Materials with high compressibility require more energy for densification, hence requiring higher molding pressures. For example:
- Bulk molding compounds (BMC): Require higher pressure compared to sheet molding compounds (SMC).
- Complex shapes or large, thin-walled, or deep products: Require higher pressure to overcome greater flow resistance.
High molding temperatures accelerate the cross-linking reaction, increasing the viscosity of the molten material, which necessitates higher molding pressures to ensure cavity filling.
While high molding pressure can increase product density, reduce molding shrinkage, and eliminate defects like swelling or air pockets, excessive pressure may:
- Reduce mold life.
- Increase power consumption of the hydraulic press.
- Cause residual stresses in the product.
To avoid excessively high molding pressures when processing thermosetting plastics, techniques like pre-compression, preheating, and moderately increasing molding temperatures are often employed. However, improper preheating conditions (e.g., excessive preheating temperature or time) can partially cure the material, reducing flowability and ultimately requiring even higher molding pressures.
3. Control of Molding Time
Molding time, also called compression molding hold time, refers to the duration the material is subjected to heat and pressure inside the mold, from the moment the mold fully closes (or after the final venting) to when the mold is opened.
The primary function of molding time is to ensure sufficient curing of the material to form a product that conforms to the mold cavity.
Curing is the process of forming a network structure in thermosetting plastics. From a chemical perspective, curing is the progression of the cross-linking reaction. However, in manufacturing, “complete curing” means that the cross-linking reaction has reached a suitable level where the product’s physical, mechanical, or other specified properties meet the desired standards.
- Under-cured (insufficient curing): The reaction is incomplete, resulting in poor mechanical performance, dull appearance, and warping or deformation after demolding.
- Over-cured (excessive curing): Prolonged molding time leads to excessive cross-linking, increased shrinkage, internal stresses between resin and fillers, reduced surface quality (e.g., darkening, bubbling), and even cracking.
Factors influencing molding time include the material’s curing rate, product shape and wall thickness, mold structure, molding temperature and pressure, as well as whether pre-compression, preheating, or venting is involved. Among these factors, molding temperature, product wall thickness, and preheating conditions have the most significant impact.
- Proper preheating: Speeds up material heating and cavity filling, shortening molding time.
- Higher molding temperatures: Shorten molding time.
- Thicker product walls: Require longer molding time.
When molding temperature and pressure are fixed, molding time becomes the critical factor determining product performance. A well-controlled molding time ensures optimal curing, reducing defects and enhancing properties like heat resistance, strength, and electrical insulation. However, overextending molding time decreases productivity, increases energy consumption, and may lead to defects as described above.
Fiberglass yachts may encounter various issues, including cracks at structural joints, leaks at openings, bubble formation or black spots on the deck surface, blistering of non-slip areas, bottom leaks, scratches, and color changes on the surface gelcoat. These problems may arise from manufacturing oversights or improper use, leading to abnormal conditions in the fiberglass.
Common Issues and Solutions
- Color Change, Bubbles, and Black Spots on Surface Gelcoat:
- Causes: Variability in curing agent ratios during repairs or color differences in batches can lead to discoloration. Trapped microbubbles and dust during layering may cause surface bubbling or black spots.
- Solutions:
- For color differences, sand off the gelcoat layer and reapply a matching gelcoat, then wet sand to #1000 and polish.
- For bubbles/black spots, gouge out affected areas, reapply matching gelcoat, and finish with sanding and polishing.
- For deeper bubbles, excavate the area, fill with chopped mat and resin, cure, then reapply gelcoat and polish.
- Cracks at the Hull and Deck Joint:
- Causes: Impact collisions typically cause cracks at the gunnel joint.
- Solutions:
- For minor impacts, remove the rail and repair the fiberglass with structural adhesive and bolts, then reinforce.
- For larger impacts, consult a dealer for professional repair.
- Cracks at Gelcoat Between Fiberglass Parts:
- Causes: Cracking often occurs where fiberglass components meet the deck due to wear over time.
- Solutions: Remove excessive gelcoat and reinforce with mat and resin, then reapply matching gelcoat and polish.
- Water Accumulation on the Deck Surface:
- Causes: Poor drainage from non-slip or teak decks can lead to localized water pooling.
- Solutions:
- For localized pooling, add drainage outlets.
- For larger areas, regrade the surface for better drainage.
- Bubbling of Non-Slip Boards and Cracking at the Wall Joint:
- Causes: Bubbling occurs from prolonged use; cracking often results from poor installation.
- Solutions:
- Remove and replace the bubbled non-slip boards while ensuring the pattern continuity matches.
- For cracked joints, gouge out the area and repair accordingly.
- Leaks at Large Window Openings:
- Causes: Deformation from impacts or poor installation leads to leaks.
- Solutions:
- Replace deformed windows with new matching units.
- For general leaks, remove any wooden trim, reseal, and reinstall.
- Leaks at Porthole Openings:
- Causes: Often due to poor installation.
- Solutions: Remove the wooden trim, reseal, and reinstall.
- Leaks at Equipment Installation Openings:
- Causes: Leaks often arise at openings for various installations, such as engines or plumbing systems.
- Solutions: These jobs require professional expertise; consult dealers for proper repairs.
- Leaks at Anchor Equipment Openings:
- Causes: Poor installation can cause major leaks affecting the anchor machinery.
- Solutions:
- Reinstall the anchor equipment with proper seals.
- Check drainage systems to ensure proper slope.
- Minor Leaks on the Hull Surface:
- Causes: Poor construction at the hull bottom may lead to leaks over time, resulting in increased boat weight and reduced speed.
- Solutions: Lift the yacht for thorough inspection below the waterline.
- Leaks at the Hull Openings:
- Causes: Multiple inlets and outlets below the waterline risk leaks due to poor installation.
- Solutions: Conduct a thorough inspection of the hull below the waterline.
- Scratches and Cracks from Accidental Collisions:
- Solutions:
- For minor scratches, remove the surface gelcoat, fill with repair putty, reapply gelcoat, and polish.
- For scratches affecting the fiberglass, remove the gelcoat, use chopped mat and resin to fill depressions, cure, and finish with gelcoat and polishing.
- For significant cracks due to collisions, consult professionals as safety may be compromised.
Commonly, when customers ask sales representatives about the expiration date of fiberglass, they are often told that it has no expiration date and can be stored indefinitely. However, this overlooks a critical factor: moisture can negatively affect fiberglass, compromising the strength of the resulting fiberglass products.
Impact of Water on Fiberglass
Water affects fiberglass in two main ways:
- Adsorption: Fiberglass has a large specific surface area, which means it can absorb more water than traditional glass. This surface adsorption of water can reduce the electrical insulation properties of the fibers. Additionally, the water film on the surface weakens the bond between the fibers and the resin, ultimately affecting the curing strength of the fiberglass and potentially leading to incomplete curing.
- Dissolution: Water can dissolve alkali metal oxides present in fiberglass, which decreases the fibers’ strength. Therefore, for fiberglass and its products used in applications where moisture levels are high, it is advisable to dry them before use.
Hygroscopic Nature of Fiberglass
Hygroscopicity refers to the ability of fibers to absorb moisture. Compared to other fibers, fiberglass has relatively low hygroscopicity, primarily affected by the uneven adsorption of moisture in surface cracks. Fiberglass has much lower moisture absorption compared to organic fibers. The higher the humidity in the air, the more water it absorbs. Alkali-free fiberglass has the lowest moisture absorption, while alkali-containing fiberglass absorbs more. Fiberglass fabrics tend to absorb moisture more than the fiber itself, and the moisture absorption of fiberglass fabric is influenced by its weaving pattern.
In the fiberglass processing industry, the issue of shrinkage and deformation is a recurring topic. What causes this phenomenon? There are two main mechanisms responsible for shrinkage: curing shrinkage and cooling shrinkage.
Curing Shrinkage
Curing shrinkage occurs in two stages: during the curing process (before demolding) and during post-curing (after demolding).
- Curing Shrinkage Definition: This refers to the volume change of the resin during the curing process. Curing shrinkage is inevitable, and it is preferable for it to occur before the part is demolded.
- Post-Curing Shrinkage: After demolding, additional curing continues, leading to further shrinkage that can cause appearance defects on the mold surface. This is often referred to as “post-curing,” but the actual deformation results from this additional shrinkage during the post-curing stage.
To mitigate these issues, selecting suitable low-shrinkage resins is the most effective approach.
A conventional rule of thumb for room-temperature cured polyester is that for every 25% fiberglass reinforcement by weight, the shrinkage is approximately 1/32 inch (1.975px) per linear foot. Compared to fiber-reinforced resins, gel coats tend to shrink more, causing greater warping on the gel coat surface. For this reason, any large, flat areas should be slightly convex to prevent indentations in the opposite direction. Small panels may adopt a bulge of about 1/4 inch (15.875px) per linear foot.
Cooling Shrinkage
Cooling shrinkage occurs as layers cool at a stress-free temperature, resulting from thermal contraction, which is related to the temperature at which the resin hardens. The greater the temperature difference between the stress-free temperature and room temperature, the more cooling shrinkage will occur.
To control cooling shrinkage, efforts should be made to reduce the exothermic temperature during layer curing. Fully curing the resin helps to minimize post-curing shrinkage, which may require raising temperatures. Lowering the exothermic temperature and avoiding high temperatures can also reduce cooling shrinkage. Therefore, the optimal curing plan largely depends on the exothermic temperature of the layer and the weight of the resin surface area.
The issue of insufficient resin saturation in fiberglass surface mat can lead to curing defects, resulting in decreased overall strength and posing potential risks.
Solutions:
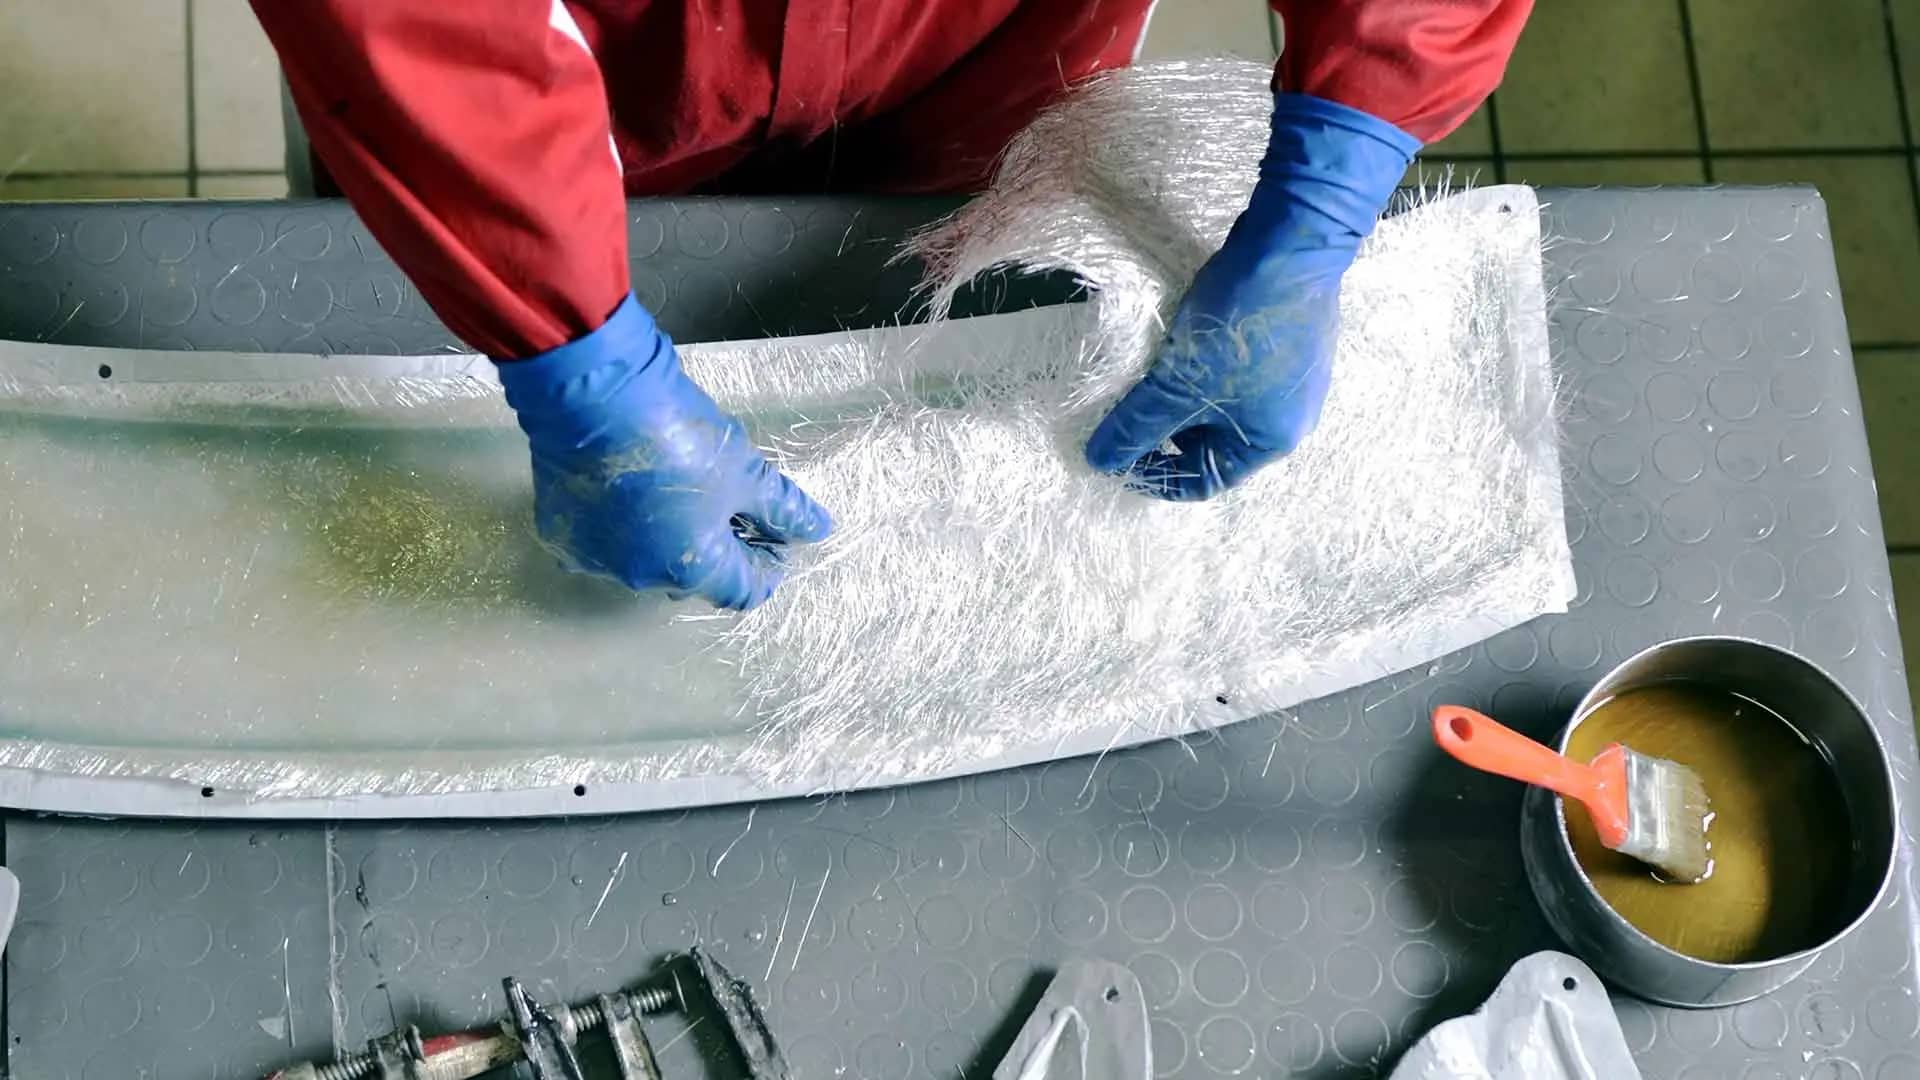
- For Uncured Areas: If the resin has not yet cured, continue to add resin and use a roller to compact and push the bubbles away, ensuring complete coverage.
- For Fully Cured Areas: If the mat has completely cured, sand down the areas where bubbles have formed, and then apply resin to those defect areas to ensure penetration.
- For Semi-Cured Areas: You can choose either method 1 or 2, or you may opt to remove the entire area and re-laminate, depending on the specific site conditions.
It’s important to note that if I were to teach how to properly saturate surface mat, many experienced fiberglass workers might dismiss it as too elementary. They often believe that simply applying resin is sufficient. This mentality can lead to these potential defects, and in some cases, workers may rush the process and apply subsequent layers prematurely, which is strongly discouraged.
Additional Notes on Surface Mat Application:
Ensure that you use enough resin—ideally, over 80% saturation is recommended. Apply resin using a brush-and-roll technique rather than a flat brush, as this helps to prevent the formation of wrinkles and waves.
Methyl Ethyl Ketone Peroxide (MEKP) is a curing agent commonly used for unsaturated polyester resins, and it is indeed possible for it to freeze under certain conditions. However, this occurrence is rare and typically requires two specific conditions to be met:
- The environmental temperature must be below 0°C (32°F).
- The peroxide content (specifically, the amount of hydrogen peroxide) in the MEKP is excessively high.
MEKP is produced through a reaction involving acetone and hydrogen peroxide in the presence of sulfuric acid. Many lower-quality MEKP variants exhibit water content levels ranging from 15% to 21%, primarily for economic reasons. Since the freezing point of hydrogen peroxide is approximately -0.4°C, a high water content combined with low temperatures can lead to the possibility of freezing or clumping.
In contrast, MEKP used for gel coats is of higher quality, typically containing less than 1% water. This ensures lower pinhole rates and improved curing efficiency, making freezing or clumping highly unlikely.
If MEKP does freeze or clump, the best course of action is to place it in an environment with a temperature above 0°C, allowing it to thaw naturally. Avoid applying direct heat or using it while frozen, as this could affect its performance.
The whitening of vinyl ester resin upon exposure to water is primarily caused by the insufficient curing of the surface layer due to a short post-curing time.
It is recommended to allow the resin to cure for 15 days before putting it into use in an environment at around 25°C. For corrosion protection projects conducted in winter, it is advisable to extend the drying time appropriately. Only when the barcol hardness exceeds 30 should the resin be put into operation.
In rare cases, the whitening may be attributed to inherent factors of the resin itself. Fortunately, once the water evaporates, any white powder on the surface can usually be wiped away, revealing the original resin color underneath, maintaining a hard finish. This type of whitening is typically normal and does not affect the resin’s chemical resistance.
Increasing the proportion of the curing agent (MEKP) can also help mitigate the occurrence of whitening when the resin comes into contact with water.
For professionals in the fiberglass industry, unsaturated resins are typically categorized into two types: those containing accelerators and those without.
- Resins with accelerators are often used for product manufacturing, such as in creating outer shells. The inclusion of an accelerator simplifies the process, allowing customers to focus primarily on the correct dosing of the curing agent. Generally, these resins offer superior performance due to the reduced risk associated with shortened storage time.
- Unsaturated resins without accelerators, such as 191 resin, are typically employed for corrosion resistance or when the amount of additives needs to be determined based on specific environmental conditions. The aim of omitting accelerators is to lower the per-unit cost for clients.
When testing accelerators, it is important to ensure accurate dosing. Does the amount of accelerator impact the curing process when the curing agent quantity remains constant?
The reasoning is similar to that of curing agents: an excessive amount of accelerator will speed up curing, while insufficient amounts can lead to incomplete or uneven curing, especially when fillers are added or temperatures are low. Therefore, both curing agents and accelerators must be adjusted based on specific circumstances.
Aluminum hydroxide is an inert, odorless filler powder that can significantly enhance the properties of unsaturated resins when used in casting products. It can be added in a ratio of nearly 200% of the resin’s weight; for instance, 200 grams of filler can be incorporated into 100 grams of unsaturated resin. This addition helps to minimize shrinkage and notably improve thermal stability, which results in heavier and more substantial cast products. However, increasing the filler content may lead to challenges such as increased difficulty in pouring and a decrease in surface finish quality.
It is possible for unsaturated resin to eventually cure even if the promoter is forgotten, but the process will be significantly slower.
As you might expect, even if it does cure, the resulting strength will be inadequate. Forgetting to add a promoter, while not common, can happen. For instance, certain unsaturated resins, like the 191 type, are non-promoted and cannot cure properly without the addition of a promoter.
After forming fiberglass components, no defects may be apparent, but air bubbles can appear in the gel coat after heating to 80°C, as shown in the image.
Is it due to the gel coat’s insufficient temperature resistance or other factors?
Intuitively, the presence of air bubbles in the gel coat layer might not be noticeable at room temperature, but they can become apparent under heating conditions.
A simple method to investigate this issue is to examine the area of the gel coat where the bubbles have formed. Look for any traces of fiberglass.
If there are no fiberglass marks, the bubbles are likely due to issues such as high moisture content in the spray or hardener leading to trapped air. If there are fiberglass impressions, the bubbles may originate from careless roller application or insufficient gel coat coverage, which highlights the need to apply a layer of resin after the gel coat.
Of course, factors like too thin a gel coat and low temperature resistance can also cause bubbling, but 80°C should be safe for standard gel coats, so this factor can likely be ruled out if bubbling is localized.
Aesthetics matter greatly to customers, as the first impression of your fiberglass product comes from the appearance of the gel coat. Therefore, adhering to proper procedures is crucial.
Zero shrinkage mold resin typically contains a high level of filler materials, specifically low shrinkage additives. These additives are generally more cost-effective compared to solvent-based fillers.
The presence of fillers might lead to a higher viscosity, which can affect the resin’s ability to wet out and penetrate properly. Therefore, it is essential to stir the resin thoroughly and roll it out carefully before use.
Some may wonder if they can add inert fillers to the resin themselves to reduce shrinkage. While this is possible, it is crucial to consider the viscosity of the mold resin and how the added fillers might impact its performance.
In conclusion, the efforts put forth by manufacturers to achieve zero shrinkage results from extensive testing and comparisons. Simply adjusting the formulation on your own may not yield the same effectiveness.
First, it’s essential to distinguish whether the gel coat being sprayed is an epoxy gel coat or a polyester gel coat.
In the fiberglass industry, polyester gel coat is the most commonly used, encompassing vinyl ester mold gel coats, standard product gel coats, and various performance types, including easy-sanding gel coats and air-dry gel coats.
So, how do you choose between styrene and acetone?
For epoxy gel coats, acetone is the most suitable choice due to its excellent dilution properties, which can help save costs.
However, the focus of this discussion is on diluting polyester gel coats. Both acetone and styrene can be used for dilution, but styrene is preferred. This is because styrene is the main solvent in the gel coat and can participate in the cross-linking reaction, while acetone cannot. Additionally, acetone can introduce bubbles due to its volatility.
There’s a potential risk to consider. Most fiberglass workshops typically stock acetone for cleaning resin off tools but rarely keep styrene on hand. As a result, many people resort to using acetone for diluting gel coats, despite it not being the ideal choice.
While gel coats are formulated to be spray-applied without any additives, it is essential to consider that the issue may lie in using the wrong spray gun nozzle size rather than seeking a diluent. Any form of dilution can alter the original formulation, resulting in less than optimal performance.
If dilution is necessary due to circumstances, it is recommended to use less than 5% styrene as a diluent instead of acetone.
Regardless of the cause of adhesion in the mold, the first step is to carefully detach the bonded parts while minimizing damage to the mold. After all, fiberglass molds represent a significant investment.
First, confirm whether this is the first use of the release agent and check for any prior issues. Most mold release problems arise from using incompatible release agents without conducting proper release tests.
Conduct a tape test on the areas of the mold that have adhered to determine if the adhesion is due to improper application of the release agent, especially in hard-to-reach areas. Then, assess if the issue is localized to a specific region or if it’s a persistent problem with one particular mold.
If you confirm that the application of the release agent has been correct and no significant issues have occurred previously, it may simply be that the affected area needs more frequent applications of the release agent, such as edges or other worn areas.
The occurrence of adhesion in fiberglass molds may relate to wear, edge cutting, or demolding angles. The key takeaway is to choose the right release agent; an incompatible release agent can work for demolding but may not provide optimal results.
